Tuesday, 27 February 2007

I left my heart in Finland


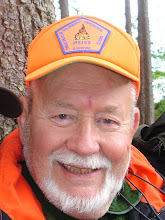
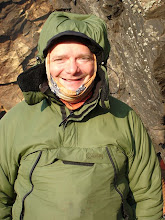
Recently I was lucky enough to take a small group of friends on a test course out to Finland - words really can not express the wonderful time we had, the Finnish people are among the best in the world, I've nothing but praise for their friendliness and the warm welcome they are gave us.


Landing in Roveminia Airport (home of Santa and right there on the edge of the Arctic circle was a treat, its like Christmas all over again. The time we had in country playing in Temperatures down to a fresh -32 C were great - so as the singer says a picture paints a thousand words .........I hope you enjoy these few .............


I left my heart in Finland mid the snow and the tower spruce tree,
For how that cold land calls to me with the whisper of the breeze.


Wednesday, 14 February 2007

Neck Knife


Having spent a lot of time over the years working with Scandinavian peoples I've come to appreciate the strengths of the 7" Saami knife - or Leuku as we Brits call it.

But very few northland folk carry the Leuku alone, they nearly always carry a smaller utility knife either a puukko on their belt or a small knife worn around the neck (a come practice among native americans too).

Such a combo for the Northlander replaces the compromises and incompleteness of carrying a medium sized knife with an axe like the SFA and saw as in a frozen land they can do ALL they need with these to knives - prefering a 3/4 or full axes for heavy chopping work and veiwing the popular UK combo as amateurish and not much good for long term living in the boreal forests.

I also find this sort of combo (neck and Saami knife) very versatile and am pleased to announce that we have finally found a UK based maker to produce a small Neck knife for us. These tough little tools are 3mm thick A1 tool steel with rosewood handles and come complete with a hand stitched neck sheath.

Watch the website for this new addition to our range!!

Thursday, 1 February 2007

The new BFK and DFK have landed


There are few times in a mans life when he can justify getting excited and the arrival of a new range of cutting tools is one of them - especially if your a bushcrafter!!

Today saw the arrival of the new DFK so before we get them on the website I thought I'd share the information and first pictures with you.

Damascus Field Knife
Modelled upon the more common style of bushcraft knife the Damascus field knife is a real work horse as well as a tool of aesthetical beauty any bushcrafter would be proud to own.

The Damascus steel composition is 125 layers of 1084 high carbon steel and 15n-20 with 2% nickel. The steel is first forged into 125 layers and then forged into a round bar. When the steel is at welding temperature the bar is twisted like a rope and then forged back into billets of Damascus.

The Damascus is then heat treated at 1500 degrees and quenched in oil. At this stage the Damascus is too hard and must be tempered back to a useable hardness. This done at 400 degrees for two hours and then repeated a second time. The blade is then ground, buffed and acid etched to bring out the beautiful Damascus pattern in the steel.

Being hand made these full tang knives are all unique and have a rustic look and feel to them as the maker often extenuates the natural shape or beauty of the materials he uses.
DFK’s are available with Antler, Horn or Masur Birch handles (scales) and come with a veg tanned leather belt sheath with firesteel loop attached – sheaths are available in either black or chestnut brown leather. Please contact with your choices of materials and sheath colours when ordering


Saturday, 20 January 2007

Bushcraft Basics. Part 1

Each week I'll be publishing a new item in the bushcraft basics list - this week we start but looking at our most important of all the cutting tools.

Nessmuk favored a “trinity” system of cutting tools, his little double bit hatchet, a light fixed blade and a substantial Moose pattern folder. Nessmuk’s views towards knives are arch-typical of the classic outdoorsmen; he preferred thin knives, keen edges and a useable length..

A pair of utility knives are most favourable – generally this means a larger camp knife and a smaller knife designed for cutting tasks such a game or food prep and whittling.

This trinity is what we favor also – our trinity being,

Sheath knife such as BFK
Pocket knife like the Opinel
Axe or hatchet such as the SFA.

Or

A Scandinavian option,
Scandi style neck knife
Leuku
Felling/full forest axe

This lecture deals with the tools a woodsman uses in his everyday activities.

Five kinds of Tool are generally employed in Bushcraft,

Bow saw
Folding saw
Axe
Knife
Crook knife

Another tool used in tropical environments is the Golok or machete.

Before picking up any tool in the outdoors ALWAYS pick up your first aid kit!! – Carry a small cuts kits with your knife a FFD IS IDEAL.

Be strict about this rule!

Never leave a tool unsheathed when not in use it can cause injury to ourselves – others or important equipment.

The knife

Our most valuable tool in Wilderness living is the knife.

Your knife is your life – which means choosing the right knife is extremely important to the woodsman who relies on his knife to perform all the tasks he asks of it.

There are many types of design of knife on the market and as such looking for a good one can be quite baffling. Generally the following features are desirable in a good field knife.
- The tang should run through out the handle (full tang) this should be one piece of steel and not thin towards the hilt.
- Tang should be reasonably wide ideally the same width as the blade as this lends itself to tasks such as splitting and hammering.
- Handle shaped is important – an oval shape is best as this will cause less fatigue in the hand from prolonged use.
- No guard – this is for fighting knives in bushcraft a guard will get in the way.
- The tip should be in line with the centre of the knife all the way through the handle. This gives the tip strength but also keeps it clear of bones ect when skinning or butchering game.
- The blade edge has a gentle curve from tip to handle as this is easiest to sharpen.
- Flat bevel with a edge of approx 25 degrees
- Capable of fine work but robust enough to act as a wedge for driving into wood.

Dimensions – blade length should be equal to your hand width for mechanical advantage ect. Spine not to thick to allow food prep ect.

Carbon VS Stainless steel.

For bushcraft work we generally opt for carbon steel. It is our preference because,
- It has soul – the steel reacts to the weather and materials cut – it will rust and as such needs to be looked after.
- Takes a keener edge – but needs more maintenance (generally speaking)
- Sparks with flint

That said stainless steel has its place especially is constantly working around water – stainless’ advantages are,
- Doesn’t rust – more hygienic
- Generally will not take or hold a razor edge but will hold a sharp edge much longer (high carbon stainless steels are the exception here)
- Hard or soft temper

Carrying your knife.

Always carry your knife on your person. I usually suggest students wear their knives around their necks in the Native American fashion because there is less chance of losing it and as such they are always aware of its weight and would notice its absence.

Note – a blade longer than 7.4cm is deemed as an offensive weapon -.so a knife worn around the neck and under your shirt will not upset anyone you can chance upon in the woods. It’s safe and discrete (Learn and observe the laws in your country)

A knife worn on a belt interferes with the waist straps of a rucksack unless it has a strap similar the the BFK or the classic scandi, htese are designed to hang below the belt and give free unhindered carriage and movement.

If a knife is left lying around it is a danger to everyone – never do it – always return to sheath after use! This is the classic sign of a poorly trained amateur and as such you will be deemed a very poor woodsman

4 BASIC BLADE CONFIGURATIONS

Convex – seen on axes and machetes this is good for chopping at its robust and lasts a long time. The convex edge is easiest to produce but is not good to wood work and carving.
Concave – Hollow ground edges are usually mass produced and are generally fairly cheap to buy. They are hard to maintain and have an inherent weakness.
Secondary Bevel – this is most common and is actually so very good for carving and is also prone to rapid edge lose and is harder to sharpen.
Flat Bevel – blades with a flat, single bevel are strong, good for carving and splitting wood as well as being easy to sharpen.

Other knives

- Folding knives – are useful easily in food prep but they lack the strength of a sheath knife. The locking mechanism can fail making them dangerous to use.


Next we will look at how to maintain and sharpen your knife.

Wednesday, 20 December 2006

Bushcraft Christmas

Santa is a bushcrafter too,
How else does he know what to get me?
A non special knife just wont do,
Will santa this year forget me?

I cant blame the wife she's suffered all her life,
With my bushcraft fascination,
So if santa dont come - one things to be done,
Father Christmas Assasination!

I'll whittle the tree in to a bow and arrows you see,
And wait for the old fellow that night.
And if he comes the chimney or Stair,
I'll skewer there him - just right!

There in the dark in my swanni and hat,
I feel like a kinda of wolly.
As I cry out in pain again and again,
Cos' I pricked myself on the Holly.

Alone in the dark I hear a fox bark,
Then an owl calls softy outside,
Dropping my bow I hurry and go,
Back up to my big bed and hide!!

When morning doth come I welcome the sun,
But remember how my legs turned to jelly,
This bushcrafting game if its all the same,
I'll just watch on the telly.

Tuesday, 19 December 2006

Scandi style pot hanger


Scandinavian Pot Hanger.

In the world of bushcraft there is an amazing array of different suspension systems designed to assist us in hanging a pot above our camp fire to boil water or help us slowly simmer that backwoods stew.

But be it a Waugan stick, a dingle or a cooking crane of the most cunning design one defect in them all is the fact that the ‘crafter’ needs to spend time searching out the correct materials. ‘Not a hardship,’ I hear you cry, and you’d be right as there is always pleasure to be had, and wonders to be found while searching the woodland for that hook or forked stick of correct length and size.

But imagine that time is short before darkness descends upon you and its raining or your choice of materials are limits as might be the case in the northern boreal forests.

Well, all is not lost and thanks to the cunning wilderness living skills of a very good Swedish friend of mine, Preben Mortensen the granddaddy of Swedish survival, the wily outdoors person can quickly carve a Scandinavian pot hanger and is so doing not only impress their friends with their knowledge and knife craft but also, perhaps more importantly, quickly get the pot over the fire for that essential warming brew or meal.

So where do we begin?

First, select two thumb thick sticks with a forked off shoot at one end and one short straight section as pictured above.

Green wood while not essential is best for this being easiest to carve and less likely to suffer damage from fire in the short term. Try to select the wood from non-toxic trees or trees without a heavy resinous sap by nature as we don’t want to risk contamination our food even if this risk is small

A tip here is to leave all wood, at this stage, as long as possible so we can measure and trim it later – this will allow us to hang our pot at the optimum height about the fire.

Now having selected our materials and checked they are sound and not rotten or weak in anyway (don’t want our dinner dropping into the fire now do we?) we can happily make our way back to camp where we will work on the next stage of our hangers construction.

Having erected our crane, be it two forked sticks with a cross bar (more correctly called a Waugan (a name predating the turn of the century and as such the correct term given its age and in common usage by our US friends) or a Saster, Speygelia (what we Brits might call a Waugan stick thanks to TV or modern literature) over our fire measure the points where our two branches (once carved) will meet and in so doing lift our pot to the correct height about the fire. Once marked we take our knife and remove approximately half the wood from the poles length (as shown below) remembering to remove the material from the side of the pole away from the fork.


*Note the notched or beaked under cuts carved into the lower ends of the pole will become more apparent later.


Having carved both pieces as above pay particular attention to the removal of the ends of your poles (these being tops furthest away from the forked side branches). These are cut at a 60 degree or so angle so they face away from the carved or exposed wood with the angle going back towards the fork branch side where it is sticking out and as such both should be cut to a length which when placed together and slid into the notches on the adjoining half lock the whole thing together – see below


This done we can fine tune the lengths of our set up, adjusting the height of the pot (not the bottom of the lower forked stick) but so it is at a height where we can hold our hand above the fire for approximately 5 seconds without burning ourselves. This height above the fire will generally (flames going up and down, wind speed ect ect) ensure we boil water or cook food with the minimum risk of it burning if left unattended for short periods of time but also without wasting fuel by needing a hotter or longer burning fire.

I digress however so let us return to task.

Our forked sticks should now interlock but will lack the strength to stay locked together once weight is placed upon them so now we must make ourselves the locking bar. For this take our third shorter piece of wood and carve it into a flat square piece of a size approximate to the forked sticks but wider if placed horizontally across them (for thumb thick sticks your looking at a piece approximately 10mm wide by 20mm high and 80mm long – of course as with all things bushcraft these are only guides and the dimensions of your materials will dictate)

Finally we need to carve the lock itself. Place the finished locking bar across your two poles in a position central to both and mark the poles on the exposed side and across the grain to the width and half the depths of the locking bar.

Then using stop cuts remove the waste material inside these markings as below.


Carve slowly and with care as to much wood being removed will make the final hanger ineffective as the locking bar will not be able to lock the two poles in place.

This done we are finally ready for completion.

Place the two halves of the pot hanger together, their forks should now both be facing outward, and gently tap the locking bar into the carved lock recess. The bar should not slid in easily as its role it to force the two halves apart and thus friction lock the slanted ends tightly into the carved beak notches.


Once this is done and the whole hanger is locked tightly together we can trim off the ends of the locking bar so it sits flush to the wood.


Now is the time we can also trim off the forks of our two halves leaving them long enough to take our pots bail arm or handle but not so long as to get in the way during usage. Also remember to remove any other waste material until our finished article looks similar to the below.

This done all that remains is for us to fill the pot and hang it above the fire while we sit back contented in having displayed a new skill which will become a familiar friend on many future trails.

Saturday, 16 December 2006

Bannocks and bacon

Outdoor cookery guide
Outdoor cookery is an entertaining and fun way for enjoy your meals. Whether on the BBQ or over an open fire there are a few tips and tricks that can help you get the most from your experience.

Aside from the recreation aspects of cooking we should also consider its importance in bushcraft – a tasty meal, well presented would boost morale, lift flagging spirits and in many ways make what might be a terrifying experience less daunting. As well a feeding the spirit we are also feeding the body so we need to ensure we utilize all the nutrients and goodness of each meal by avoiding over cooking and controlling waste (waste of fuel and water as well as food).

Just like any budding Jamie Oliver, an outdoor chef needs to learn a few basic techniques before he can begin to enjoy those tasty treats that await him.

Ground oven cook times.
Food cannot be burnt or spoilt if cooked in a correctly constructed ground oven. Always allow the correct time so that your food can cook through. As a rule of thumb, I always add a little extra to be safe.

Haunch of Deer, pig or goat
2 Hours per Lb

Rabbit or Hare
4 hours

Squirrel
2 hours

Fish
45 mins – 1 hour

Shell fish
30 – 45 mins

Crab (small)
30 – 45 mins

Roots and tubers
3 – 5 hours

seaweeds
3 hours

Steaming times

Steaming works well on small game – to cook larger fare fire management is essential.

Fish
20 – 40 mins

Rabbit or Hare
2 hours

Shell fish
1 hour (discard any that remain closed)

Roots and tubers
4 – 5 hours

These are a few of the more expedient techniques you will be using as the series progresses – while steaming and ovens are good ways to cook don’t forget you can also boil your food as well as broiling and frying.

Let us look at rations – military rations and camping foods will be covered in later issues but for now, I want to get right back to basics – using ingredients readily available around the world both past and present.

In the heyday of the Fur brigades of the Rocky Mountains large companies such as the Hudson Bay Company and the North West Company issued their trappers and Voyageurs with rations, below is a list of what each man would received.

HBC ration: _
2 Lbs flour or 11/2 lbs sea biscuits (pilot bread)
1 lb fat mess pork (salt pork with no meat – what is called fat back)
2 oz sugar
½ oz Tea
½ oz salt
½ oz carbonate of soda (baking soda – for leavening Bannock bread)
2 oz peas or 2 oz barley

The peas and barley where intended to be boiled along side any game taken upon the trail.
This ration per man would weight 347 pounds if rationed for a 15-day trip.

NWC Voyageur’s meal
1 quart dried peas
4 oz salt pork
1 or 2 hardtack biscuits (British military rations have these called Biscuits AB or use can use 4 - 6 crackers)

The voyageurs who fixed this meal ate only once a day and usually around a communal cooking pot.

From these two examples, you can see how plain and simple rationing a trip can be. Below is a meal taken from an original recipe that will transport you back to the 1800’s.

Voyageur Stew
Taking the ingredients above, soak the quart of peas until the skins split. Add salt pork chopped into cubes and simmer for 5 hour (over an open fire or until meat is tender on stove) topping up the water as needed.
When ready add the broken hardtack biscuits and stir in until the whole stew becomes thick.

Then enjoy.

Just like the wily old trapper or mountain man we can carry with us a few basic ingredients that will (with a little imagination) stretch to serve us in a whole host of different ways. These ingredients may be all that are open to the modern explorer especially in some third world country’s but more importantly they offer us versatility in our cooking as well as being a important source of carbohydrates.

Batterdough – this is a multipurpose Bannock mix adaptable to various meals and needs

If we carry the below dry ingredients with us upon the trail we can cook ourselves anything from a simple Bannock or Fire bread, golden and tasty Pan Cakes, plump stodgy mouth watering dumplings or even a tasty pie crust or Pizza.

The list is simple. To cut down on weight you should only carry what you think you will need maybe even premixing the dry ingredients at home and carrying them in zip lock bags.

Plain flour
Suet
Baking Powder
Salt and Sugar.

I usually work on a daily ration of 2lbs flour, 2oz o sugar, ½ oz Salt, ½ oz Baking powder, 1lb suet (Taken from Hudson bay company daily rations) Unless I’m carrying other food stuff then I will carry less.

The below ingredients will make one bannock to serve 2 or 10 – 12 Canadian style pancakes.

10 heaped spoonfuls of flour
1 level spoonful of baking powder
4 spoonfuls of sugar
1/8 – 1/2 of a spoonful of salt

*A spoon being the size of spoon you have with you but deemed to be roughly tablespoon size)

Mix the above ingredients allowing as much air as possible to entire the mix. When ready slowly add water and work this in little by little. For a bannock, you will want a round cannon ball of quite stiff dough.

Grease a cooking pot with melted suet and place the dough inside. Slice a cross across the bannocks top then cover with a lid and bake over the fire or in an oven until ready (check after above 20 mins at medium heat.)

Other uses,

The bannock mixture can also be cooked on a plank or wrapped around a stick (in both cases use none toxic woods) as well as in an oven or pot, ensure the plank is heated before you add the dough.
Used as a base for a pizza bread - replace plain water with 50/50 mix of water and sun dried tomato oil (or all oil) also mix into the dough salami and sun dried tomatoes then fry in melted suet.
By replacing the sugar with suet (8 spoonfuls), you can use this as a dumpling mix. (More suet if you like ‘em stodgy!)
By replacing the baking powder and sugar with 5 spoonfuls of suet, you can make a passable piecrust.
To make pancakes mix the above ingredients with water until it forms a batter. Grease a frying pan (melted suet) and fry spoon sized lumps of batter turning once to golden on both sides. Even better if you have it fry the pancakes in bacon fat and serve with Maple syrup.
Mixing the bannock mixture with beer (traditional ales) to replace water makes a tasty treat and saves on your valuable water supplies.

Nettle soup.
Can be used as an accompaniment to our Bannock or as a meal in its own right.

4 large handfuls of Nettle tops
1 large onion (optional or add Ramsons, hedge garlic and chives))
I large spoon (heaped) butter (optional)
2 pints vegetable stock, bouillon, or chicken soup.
Salt and pepper– or paprika, chilli sauce to taste

Make up stock and bring to a slow simmer. Add chopped onion and butter and allowed to simmer until onion is soft. Stir in nettle tops and bring back to boil.
Once boiling add any further liquid as required and again allow to return to the simmer for a further 5 mins. (If using hedge garlic add last just before serving and finely chop)

Season to taste.

Serve.

An interesting meal can be made by pureeing nettles tops (cooking in enough water to stop them burning and then mash once done) serve with a poached egg.

Food AND Water a wilderness guide
We all know that we need food to live. You are what you eat pretty much sums up our western attitude to food but in reality food is really of the least importance especially in an emergency situation.

However, if food’s importance is decreased waters importance is tripled. Not only do we need water for drinking but we also need it for cooking, washing and numerous other tasks.

With this in mind, I would like to point out the following facts.

Food.
You can fast for between 40 to 120 days. You may survive longer by fasting if you cannot,
Find more than 1000 calories on a daily basis.
Find 500 grams of Carbohydrate a day
If you use more energy getting food than you intake from it.

This sounds extreme but it will allow the body to go into starvation mode and in this state it will burn fuel efficiently – adding small amounts of Carbohydrate will hinder this and (as you will see below) cause you to suffer the effects of carbohydrate deprivation over and over – a most uncomfortable state of affairs. Bear in mind that we seem to fear being hungry without really understanding the effects of hunger and its effects on our bodies. We will cover more about this in later articles.

Water
You can go without it for approximately 3 days (longer in some cases 4 to 6 being the maximum)

With adequate sleep and water in take you will live until you starve to death.

However, without sufficient water you should refrain from eating and smoking as both dehydrate you. Lack of water rapidly affects the body so remember the old adage - Ration sweat not water.

Thirst is not a guide to dehydration – check urine colour regularly as this is more accurate - clear or straw coloured is good anything darker indicates dehydration. Your best water container is your body so keep it tanked up always. There have been numerous occasions where tourists and people caught out by many of the worlds deserts have perished yet surprisingly enough when their bodies are recovered they are often found to still have water in their canteens.

As a rule of thumb always try to drink at least 2 litres of water a day – I like to carry a 2 quart canteen (approx 3 pints) in my rucksack as back up to my 1 litre bottle.

While water is heavy to carry (it gets lighter as you drink it) YOU SHOULD ALWAYS CARRY SOME.


Carbohydrates, relative values.
As mentioned above we need carbohydrates in our diet as these boost our blood sugar level and kick in to provide a quick release energy this being what our bodies, our muscles in particular would rather feed upon.
However, the glycin reserves we carry within us will only last approx two days or so and after this period we will start to burn fat or more importantly our subcutaneous fats, which our body uses as insulation amongst over things.

If this happens carbohydrate, deprivation will result and with it we will experience the following symptoms (especially if we are used to a normal starchy western diet):-

· Tiredness
· Headaches
· Loss of concentration
· Irritability
· Depression
· Self absorption
· And a feeling of continual cold.

All of these can make our experiences harder and in doing so lower our morale, most dangerous of all would be its effects on our levels of concentration. It is therefore a good idea to carry a small emergency ration pack a part of which should be your daily Carb’ intake as mentioned above.

With this in mind, it is wise to carry other ingredients to boost your meal. For additional ingredients I usually look to those that contain proteins and sugars (glucose sweets or Kendal mint cake are ideal) Also carry things you enjoy eating after all that will be a small boost to your morale if nothing else.

I usually prefer to carry rations that do not require re-hydrating in any way, as this is a drain on your valuable water resources, which would, in reality, be better off being drunk.
Worse than wasting precious water, if you are injured or unable to light a fire you will also be unable to feed your internal boiler and so you will start to feel colder and this will increase your chances of a cold injury or worse.

I usually carry the following:-

2 x 50g Beef Jerky
Drinking Chocolate.
Kendal mint cake.

Remember these are emergency rations but they still allow me to have a degree of versatility. The dried meat can be eaten without cooking while the chocolate can be made into either a hot or cold drink as well as acting as flavouring for many other things. The Kendal mint cake (being almost totally sugar) is where a lot of carb’s are stored and this, as well as being full of moral boosting flavour, is pack full of instant energy.

In addition to those above, I usually carry additional e/rats (emergency rations) in my Daysack and these include,

Chewing gum (these help relieve thirst in the short term and contain sugars)
Salt (many uses including flavouring and preservation)
Seasoning (curry powder/chilli powder or Tabasco sauce all improve the bland taste of wild fare).
Bouillon or Vegetable stock cubes.
Rice or Powdered Mash.
Boil in the bag meal (if room or weight allows)


Yet let me once again point out that while food is comforting, it is normally your last priority so concentrate your efforts on finding shelter, fire and water. We westerners tend to eat far more than we actually need to and so our stomachs and our habits tend to make us feel hungry even if we are not.

Boredom will also lead to hunger pains however these can be banished by action. In the bush there will always be something else that needs doing even if it is just collecting more firewood so if you begin to feel hungry distract yourself by working at tasks that will benefit you in the long run and take your mind off your stomach in the short term.

In real terms, it generally takes three days for the body to go into starvation/survival mode. This is the point where we will start to feed off our own stored proteins such as subcutaneous fats. Once you reach this point, hunger will diminish or disappear and you will find your senses becoming very much sharper allowing you to forage more effectively because your soft western body has suddenly woken up and started to act as it was designed to do. (This is something you need to experience to believe for it is truly amazing.)

With this in mind the canny bushman (even if they have food available) should consider the possibility of fasting for the first three days of any emergency situation or adventure.
In a short term situation (most rescues happen in three or less days) carrying a small emergency rations will help you fend off hunger pains and lift your morale. If you are confident rescue will not be long in coming you could eat your eat rations anytime.

Nevertheless always remember the advice on fasting and before worrying about food sources ensure your water supply is adequate for your situation.

Finally while wild foods are useful and can be a meal in themselves or can boost your normal rations it cannot be stressed enough that you should only eat what you can not positively identify and NEVER believe or use edibility tests these were designed for soldiers in escape scenario’s and done properly take many days to carry out.